
It was a warm summer evening, and I was hosting a backyard BBQ for some friends. As they arrived, the enticing aroma of sizzling chicken filled the air, drawing them in like a siren’s call. I had decided to try my hand at the infamous “Beer Can Chicken” – a recipe that had been circulating for years, but one I had never attempted myself. Little did I know, this decision would forever change the way I approach grilling chicken.
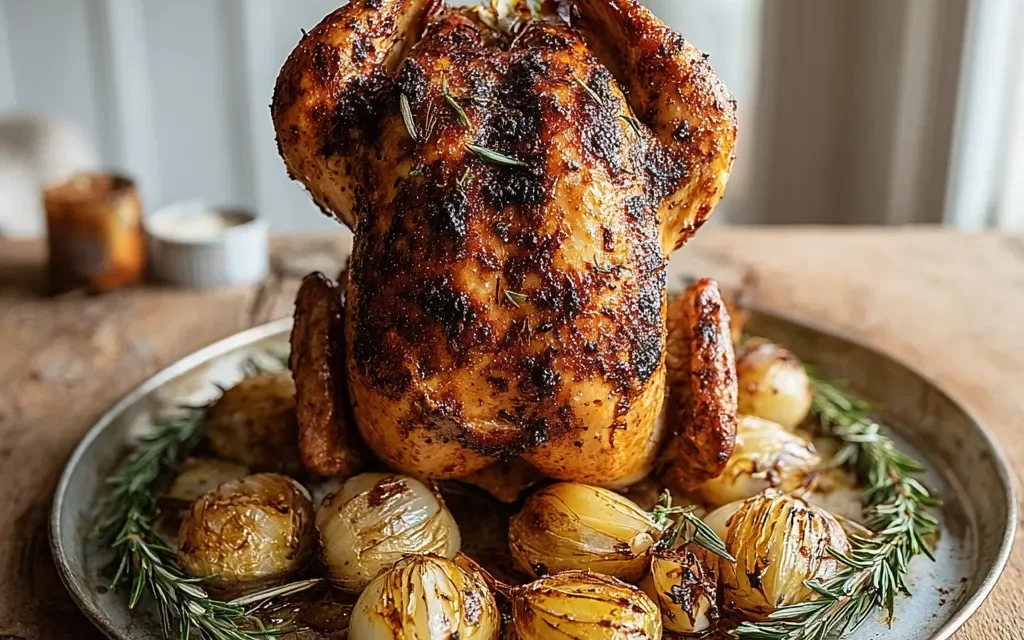
As I carefully positioned the beer-filled can between the chicken’s legs, I couldn’t help but feel a little skeptical. Would this unorthodox method really work? But as the chicken slowly roasted, basting itself in the beer-infused juices, the transformation was nothing short of magical. The skin turned a gorgeous golden-brown, crackling with each bite, while the meat remained deliciously moist and bursting with flavor.
When it came time to serve, the oohs and aahs from my guests were all the confirmation I needed. This Beer Can Chicken was a total showstopper, and it’s been a staple in my repertoire ever since. If you’re looking for a recipe that’s sure to impress your family and friends, this is the one.
Why This Beer Can Chicken Recipe Will Become Your Go-To
The Secret Behind Perfect Beer Can Chicken
The secret to this Beer Can Chicken recipe lies in the unique cooking method. By propping the chicken up on a can of beer, you create a self-basting system that keeps the meat unbelievably juicy and flavorful. As the beer heats up, it steams the chicken from the inside out, infusing it with a subtle, malty essence. And the beer’s carbonation helps the skin develop a delightfully crisp, golden-brown texture.
But the real magic happens when you pair this clever cooking technique with a perfectly balanced seasoning blend. The combination of garlic powder, onion powder, smoked paprika, salt, and pepper creates a flavor profile that’s both savory and slightly smoky – a match made in heaven for the rich, beer-infused chicken.
Essential Ingredients You’ll Need
- 1 (3-4 pound) whole chicken: This size chicken is perfect for the beer can method, ensuring even cooking and juicy, tender results.
- 1 (12 oz) can of beer: Any type of beer will work, but I find that a light lager or pale ale complements the chicken best. The carbonation and subtle flavors really make this dish shine.
- 2 tablespoons olive oil: The oil helps the seasoning blend adhere to the skin, promoting even browning and a crispy texture.
- 2 teaspoons garlic powder: Garlic is a must-have for adding depth and complexity to the overall flavor.
- 2 teaspoons onion powder: Similar to the garlic, the onion powder enhances the savory, umami notes in the dish.
- 1 teaspoon smoked paprika: This spice lends a lovely smoky undertone that pairs beautifully with the beer-infused chicken.
- 1 teaspoon salt: Seasoning the chicken thoroughly is key to bringing out all the natural flavors.
- 1/2 teaspoon black pepper: A touch of black pepper helps to balance the richness of the dish.
Step-by-Step Beer Can Chicken Instructions
Preparing Your Beer Can Chicken
With a total time of just 60 minutes (15 minutes prep, 45 minutes cook time), this Beer Can Chicken recipe is perfect for busy weeknights or casual weekend gatherings. All you’ll need is a whole chicken, a can of beer, and a few simple seasonings.
1- Start by preheating your grill or oven to 375°F. While it’s heating up, pat the chicken dry with paper towels and rub the skin all over with the olive oil.
2- In a small bowl, combine the garlic powder, onion powder, smoked paprika, salt, and black pepper. Rub this seasoning blend evenly all over the chicken, making sure to get it into all the nooks and crannies.
3- Carefully lower the chicken onto the beer can, positioning it so the can is firmly inserted into the cavity. This will help the chicken stand upright on the grill or in the oven.
4- Once the chicken is in place, transfer it to the preheated grill or oven. Close the lid (or oven door) and let the chicken roast for 45 minutes, basting occasionally with the beer-infused juices.
5- After 45 minutes, use tongs to carefully transfer the chicken to a cutting board, leaving the beer can in place. Allow the chicken to rest for 10 minutes before removing the can and carving.
6- Serve your perfectly cooked Beer Can Chicken while it’s hot, pairing it with your favorite sides. The juicy, flavorful meat and crispy skin will have everyone going back for seconds.
Pro Tips for Success
- Choose a high-quality whole chicken for the best results. Look for one that’s free-range and organic, if possible, for maximum flavor.
- Make sure to pat the chicken dry before seasoning – this will help the spices adhere and promote even browning.
- Baste the chicken occasionally with the beer-infused juices to keep it moist and flavorful throughout the cooking process.
- Use a meat thermometer to ensure the chicken reaches an internal temperature of 165°F. This will guarantee the chicken is fully cooked and safe to eat.
Serving and Storing Your Beer Can Chicken
Perfect Pairings for Beer Can Chicken
This Beer Can Chicken recipe serves 4-6 people, making it a great option for family dinners or casual gatherings. To round out the meal, I love to serve it alongside roasted potatoes, a fresh garden salad, and some crusty bread to soak up all those delicious juices.
And of course, no Beer Can Chicken feast is complete without an ice-cold beer to complement the flavors. A crisp lager or pale ale pairs beautifully, but you could also get creative with a fruity wheat beer or a hoppy IPA. For a non-alcoholic option, try serving it with a refreshing iced tea or lemonade.
Storage and Make-Ahead Tips
Leftover Beer Can Chicken can be stored in an airtight container in the refrigerator for up to 4 days. To reheat, simply place the chicken in a baking dish and warm it in a 350°F oven until heated through, about 15-20 minutes.
For longer-term storage, the chicken can also be frozen. Remove the meat from the bones, place it in a freezer-safe bag or container, and freeze for up to 3 months. When ready to use, thaw the chicken in the refrigerator overnight before reheating.
You can even prepare the seasoning blend in advance and store it in an airtight container. That way, when it’s time to cook, all you have to do is rub the chicken and pop it in the oven or on the grill.
Variations and Dietary Adaptations for Beer Can Chicken
Creative Beer Can Chicken Variations
While the classic Beer Can Chicken is hard to beat, there are plenty of ways to put a unique spin on this recipe. Try using different types of beer, such as a hoppy IPA or a rich, malty stout, to impart unique flavors. You could also experiment with the seasoning blend, swapping in herbs like rosemary or thyme, or adding a touch of brown sugar for a sweet-and-savory contrast.
For a festive twist, try stuffing the cavity with fresh citrus (like lemon or orange) or fragrant herbs. And if you’re feeling adventurous, you can even try adding other vegetables to the can, like onions or potatoes, to create a full one-pan meal.
Making Beer Can Chicken Diet-Friendly
This Beer Can Chicken recipe can easily be adapted to fit a variety of dietary needs. For a gluten-free version, simply choose a gluten-free beer. To make it low-carb or keto-friendly, you can omit the beer and instead use a flavorful broth or even water in the can.
If you’re vegetarian or vegan, you can skip the chicken altogether and try the “beer can” method with a firm tofu or portobello mushroom cap instead. Just adjust the cooking time accordingly, and be sure to baste the plant-based “meat” with the flavorful juices.
No matter how you choose to customize this recipe, the key is to have fun and get creative. The beer can method is a great canvas for all sorts of flavor combinations and dietary modifications.
Frequently Asked Questions
Q: Can I use a different type of beer in this recipe?
A: Absolutely! While a light lager or pale ale work best, you can experiment with a variety of beer styles. Just keep in mind that the flavor of the beer will come through in the final dish, so choose something you enjoy drinking.
Q: How long does it take to cook the Beer Can Chicken?
A: This recipe has a total time of 60 minutes, with 15 minutes of prep and 45 minutes of cook time. The chicken should reach an internal temperature of 165°F to be fully cooked.
Q: Can I make the Beer Can Chicken ahead of time?
A: Yes, you can prepare the seasoned chicken and refrigerate it (with the beer can inserted) up to 24 hours in advance. When ready to cook, simply transfer it to the grill or oven and follow the recipe instructions.
Q: How many people does this Beer Can Chicken recipe serve?
A: This recipe is designed to serve 4-6 people, depending on the size of your chicken and your appetites. If feeding a larger crowd, you can simply scale up the recipe and cook multiple chickens.
Q: What should I do if the skin doesn’t get crispy enough?
A: If the skin isn’t as crisp as you’d like, try basting the chicken more frequently with the beer-infused juices. You can also finish it under the broiler for a few minutes to really crisp up the skin.

Beer Can Chicken
- Total Time: 60
- Yield: 4-6 servings
Description
Tender, juicy beer can chicken is the ultimate crowd-pleasing main dish. Infused with savory spices and the unique flavor of beer, this easy recipe delivers maximum flavor in just 45 minutes.
Ingredients
– 1 (3-4 pound) whole chicken
– 1 (12 oz) can of beer
– 2 tablespoons olive oil
– 2 teaspoons garlic powder
– 2 teaspoons onion powder
– 1 teaspoon smoked paprika
– 1 teaspoon salt
– 1/2 teaspoon black pepper
Instructions
1. Preheat grill or oven to 400°F.
2. Pat the chicken dry with paper towels. In a small bowl, mix together the garlic powder, onion powder, smoked paprika, salt, and pepper.
3. Rub the seasoning mixture all over the chicken, both inside and out.
4. Open the beer can and pour out about 1/4 of the beer. Carefully place the chicken over the beer can, making sure the can is centered inside the cavity.
5. Place the chicken, with the beer can, on the grill or in a roasting pan. Cook for 45-60 minutes, until the internal temperature reaches 165°F.
6. Let the chicken rest for 10 minutes before carving and serving.
Notes
For extra crispy skin, brush the chicken with olive oil before seasoning. You can also try different beer varieties to experiment with flavors.
- Prep Time: 15
- Cook Time: 45
- Category: Main Course
- Method: Grilling, Roasting
- Cuisine: American
Conclusion
This Beer Can Chicken recipe is truly a game-changer when it comes to juicy, flavorful grilled or roasted chicken. The unique cooking method, combined with the perfect seasoning blend, results in a dish that’s sure to impress your family and friends.
Whether you’re hosting a backyard BBQ or just looking for a delicious weeknight meal, this Beer Can Chicken should be your go-to. The prep work is minimal, the cook time is a breeze, and the end result is utterly mouthwatering. So why not give it a try? I guarantee it will become a new favorite in your household.
Don’t forget to let me know how your Beer Can Chicken turns out – I’d love to hear your thoughts and see any photos you’d like to share. Bon appétit!


