
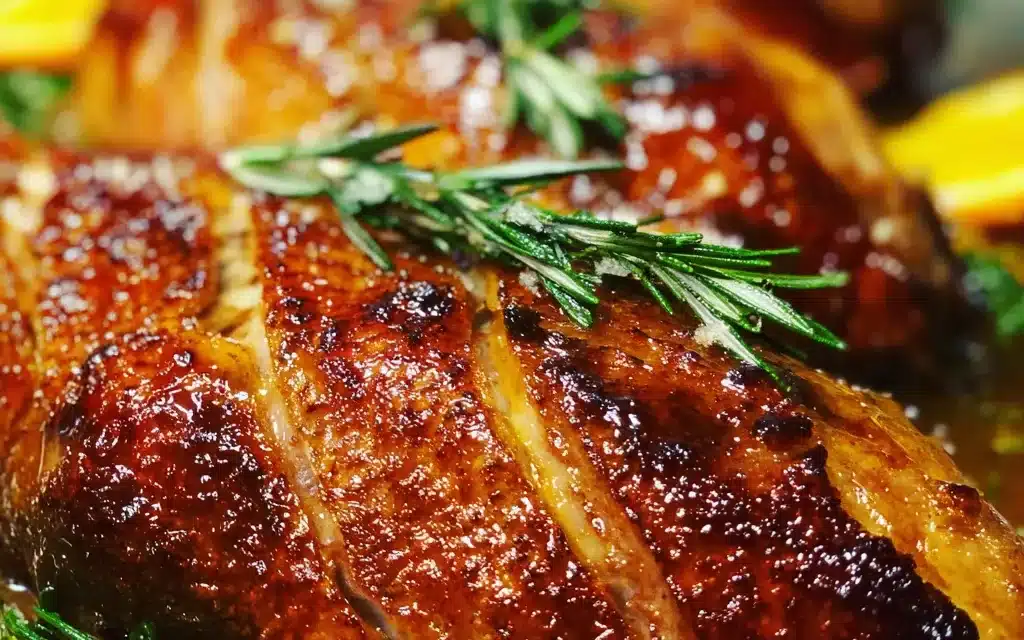
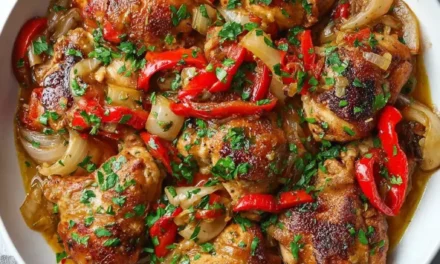
Christmas is a time for traditions, and for my family, one of our most cherished holiday rituals is gathering around the table to enjoy a perfectly roasted Christmas Duck. It’s a dish that not only delights the senses with its crispy skin and succulent meat, but also brings us together, creating memories that will last a lifetime.
As a child, I remember watching in awe as my grandma carefully prepared the Christmas Duck, meticulously seasoning it and basting it to perfection. The scent would waft through the house, filling the air with a tantalizing blend of spices and the rich, savory aroma of the bird. When it finally emerged from the oven, golden and glistening, it was the centerpiece of our holiday feast, evoking oohs and aahs from everyone around the table.
But it’s not just the taste of the Christmas Duck that makes it so special – it’s the traditions, the memories, and the sense of connection that come with it. As we’d sit down to enjoy the meal, we’d swap stories, laugh at old jokes, and cherish the time we had together. The Christmas Duck was more than just a dish; it was a symbol of the love and joy that filled our home during the holiday season.
Why This Christmas Duck Recipe Will Become Your Go-To
If you’re looking to create your own Christmas Duck tradition, this recipe is the one you’ll want to turn to. It’s the result of years of perfecting the technique, and I can assure you it’s worth the effort. The secret behind this Christmas Duck is in the way it’s prepared – the combination of spices, the slow-roasting method, and the basting process all come together to create a bird that’s both crispy on the outside and incredibly moist and flavorful on the inside.
The Secret Behind Perfect Christmas Duck
The key to nailing this Christmas Duck recipe is in the preparation. We’ll start by seasoning the bird with a blend of aromatic spices, including rosemary, thyme, and garlic, to infuse it with a depth of flavor that will have your guests raving. Then, we’ll slow-roast the duck at a low temperature, allowing the fat to render and the skin to crisp up to perfection. The basting process is also crucial, as it helps to keep the meat juicy and the skin golden brown.
Essential Ingredients You’ll Need
- Christmas Duck: The star of the show, of course! Look for a high-quality, free-range bird for the best results.
- Rosemary: This fragrant herb adds a lovely, earthy note to the dish.
- Thyme: Another classic pairing that complements the richness of the duck.
- Garlic: Minced garlic adds depth and complexity to the seasoning.
- Salt and Pepper: Simple, but essential for bringing out the natural flavors.
- Butter: Used for basting the duck, this helps to create that irresistible, crispy skin.
Step-by-Step Christmas Duck Instructions
Preparing the perfect Christmas Duck takes a bit of time and attention, but the end result is well worth it. We’ll start by prepping the bird, then move on to the slow-roasting process, and finish with the final touches that will make this dish a showstopper.
Preparing Your Christmas Duck
First, let’s get the Christmas Duck ready for the oven. This process will take about 30 minutes, and you’ll need a large roasting pan, a basting brush, and a meat thermometer. Once you’ve gathered your equipment, it’s time to get started!
1- Rinse the Christmas Duck under cold water and pat it dry with paper towels. This will help the skin crisp up beautifully in the oven.
2- In a small bowl, combine the minced garlic, chopped rosemary, and thyme. Rub this fragrant seasoning all over the duck, making sure to get it into every nook and cranny.
3- Season the duck generously with salt and pepper, both inside the cavity and all over the skin.
4- Place the seasoned duck in the roasting pan, breast-side up. This will ensure even cooking and browning.
5- Melt the butter and use the basting brush to coat the skin of the duck. This will help it to crisp up and become a gorgeous golden brown.
6- Roast the Christmas Duck in the preheated oven, basting it every 30 minutes, until the internal temperature reaches 165°F. This should take around 2-3 hours, depending on the size of your bird.
Pro Tips for Success
To ensure your Christmas Duck turns out perfectly every time, here are a few pro tips:
- Let the duck rest for at least 15 minutes before carving. This will allow the juices to redistribute, ensuring a moist and tender result.
- Don’t be tempted to open the oven door too often during the roasting process, as this can affect the even cooking and crisping of the skin.
- If the skin starts to get too dark, you can tent it loosely with foil to prevent further browning.
- Keep a close eye on the internal temperature, as you don’t want to overcook the duck and dry it out.
Serving and Storing Your Christmas Duck
Now that your Christmas Duck is perfectly roasted, it’s time to enjoy the fruits of your labor. This dish pairs beautifully with a variety of sides and makes for a truly unforgettable holiday meal.
Perfect Pairings for Christmas Duck
When it comes to serving Christmas Duck, the possibilities are endless. A classic pairing is roasted potatoes and a fresh green salad, but you could also try serving it with a wild rice pilaf or a medley of roasted root vegetables. For a touch of sweetness, a cranberry compote or a drizzle of orange glaze can be a delightful accompaniment.
And don’t forget the beverages! A crisp, dry white wine or a festive holiday cocktail can be the perfect complement to this rich and flavorful dish.
Storage and Make-Ahead Tips
If you have any leftover Christmas Duck, don’t worry – it stores and reheats beautifully. Simply carve the meat off the bone, place it in an airtight container, and refrigerate for up to 4 days. When you’re ready to enjoy it again, you can reheat the duck in the oven or even use it in a delicious soup or sandwich.
And if you’re planning ahead for your holiday feast, you can actually prepare the Christmas Duck a day or two in advance. Simply season the bird, place it in the roasting pan, and refrigerate until you’re ready to roast it. On the day of, you’ll just need to pop it in the oven and let the magic happen.
Variations and Dietary Adaptations for Christmas Duck
While the traditional Christmas Duck recipe is a true classic, there’s always room for a little creativity and customization.
Creative Christmas Duck Variations
For a twist on the classic, you could try brining the duck in a mixture of salt, sugar, and aromatic herbs before roasting. This can help to infuse the meat with even more flavor and moisture. You could also experiment with different seasoning blends, such as a citrus-and-spice rub or a Mediterranean-inspired herb mixture.
Making Christmas Duck Diet-Friendly
If you’re looking to make your Christmas Duck a little more diet-friendly, there are a few simple swaps you can try. For a lower-fat option, you can use a vegetable oil instead of butter for basting. And for those following a gluten-free or low-carb diet, you can serve the duck with roasted vegetables or a fresh salad instead of starchy sides.
Frequently Asked Questions
Q: Can I use a different type of duck instead of a Christmas Duck?
A: Absolutely! While Christmas Duck is traditional, you can use any type of duck for this recipe, such as Pekin, Muscovy, or Moulard. Just be sure to adjust the cooking time and temperature as needed, as different duck varieties may have slightly different cooking requirements.
Q: How do I know when the Christmas Duck is fully cooked?
A: The best way to determine if your Christmas Duck is done is to use a meat thermometer. Insert it into the thickest part of the thigh, being careful not to hit the bone. The duck is fully cooked when the internal temperature reaches 165°F.
Q: Can I make the Christmas Duck a day in advance?
A: Yes, you can absolutely prepare the Christmas Duck a day or two ahead of time. Simply season the bird, place it in the roasting pan, and refrigerate until you’re ready to roast it. On the day of, you’ll just need to pop it in the oven and follow the remaining steps.
Q: How do I carve the Christmas Duck?
A: Carving a whole duck can be a bit tricky, but with a little practice, you’ll be a pro in no time. Start by removing the legs and wings, then slice the breast meat against the grain. Be sure to have a sharp carving knife on hand to make clean, even slices.
Q: What should I do if the skin doesn’t crisp up?
A: If the skin on your Christmas Duck isn’t as crispy as you’d like, there are a few things you can try. Make sure to thoroughly pat the duck dry before seasoning, and baste it frequently during the roasting process. You can also try increasing the oven temperature for the last 30 minutes of cooking to really crisp up the skin.

Christmas Duck
- Total Time: 165
- Yield: 6
Description
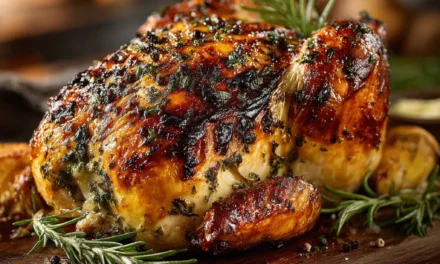
Elevate your Christmas dinner with this foolproof and divine Christmas Duck recipe! Perfectly roasted with a crispy skin and juicy, flavorful meat, this old-fashioned holiday delight is a showstopping centerpiece for your festive table.
Ingredients
– 1 whole duck (4-5 lbs)
– 1 orange, cut into wedges
– 1 lemon, cut into wedges
– 3 sprigs fresh thyme
– 2 sprigs fresh rosemary
– 1 tsp sea salt
– 1/2 tsp black pepper
Instructions
1. 1. Preheat oven to 375°F.
2. 2. Pat the duck dry with paper towels and season the cavity and outside of the duck with salt and pepper.
3. 3. Stuff the cavity with the orange and lemon wedges, thyme, and rosemary.
4. 4. Truss the duck with kitchen string to help it maintain its shape.
5. 5. Place the duck breast-side up on a roasting rack set in a rimmed baking sheet.
6. 6. Roast the duck for 2-2.5 hours, basting every 30 minutes, until the internal temperature reaches 165°F.
7. 7. Let the duck rest for 15 minutes before carving and serving.
Notes
For extra crispy skin, you can score the skin in a crisscross pattern before seasoning. Serve the Christmas duck with your favorite holiday sides like roasted vegetables, stuffing, and cranberry sauce.
- Prep Time: 15
- Cook Time: 150
- Category: Main Course
- Method: Roasting
- Cuisine: American
Conclusion
Christmas Duck is a truly special dish that’s worth the effort. With this tried-and-true recipe, you can create a holiday centerpiece that will have your family and friends raving. So why not give it a try this year? I promise, once you taste the perfect combination of crispy skin and succulent meat, this Christmas Duck will become a cherished tradition in your home.
