
The scent of freshly baked bread always takes me back to my childhood summers in Istanbul. I can still remember the warmth of the sun-drenched bakery on the corner, the gentle hum of chatter, and the way the dough would rise and fall with each practiced kneading. It’s a memory that has remained etched in my mind, a testament to the timeless allure of Turkish bread.
Why This Turkish Bread Recipe Will Become Your Go-To
The Secret Behind Perfect Turkish Bread
There’s something truly special about the way Turkish bread is made. The key lies in the balance of the ingredients and the technique used to bring them together. This recipe, passed down through generations, delivers a perfectly crisp crust that gives way to a soft, pillowy interior – the kind of bread that makes you want to tear off a piece and savor every bite.
Essential Ingredients You’ll Need
To capture the essence of Turkish bread, you’ll need a few simple yet essential ingredients:
- 3 cups all-purpose flour: The foundation of this recipe, the flour provides the structure and substance that makes this bread so satisfying.
- 1 teaspoon active dry yeast: This little powerhouse is responsible for the bread’s rise, helping to create that irresistible airy texture.
- 1 teaspoon salt: A pinch of salt enhances the overall flavor, balancing the sweetness and bringing out the nuances of the other ingredients.
- 1 1/4 cups warm water: The water is the key to achieving the perfect consistency, allowing the dough to come together seamlessly.
- 1 tablespoon olive oil: A touch of olive oil adds a rich, almost buttery quality to the bread, while also helping to create a tender crumb.
Step-by-Step Turkish Bread Instructions
Preparing Your Turkish Bread
With a total prep and cook time of just 30 minutes, this Turkish bread recipe is a true weeknight wonder. All you’ll need is a large mixing bowl, a clean surface for kneading, and an oven preheated to 425°F.
1- In the mixing bowl, combine the 3 cups of all-purpose flour, 1 teaspoon of active dry yeast, and 1 teaspoon of salt. Whisk these dry ingredients together until well incorporated.
2- Gradually pour in the 1 1/4 cups of warm water, mixing with your hands or a wooden spoon until a shaggy dough begins to form. Be sure not to overmix at this stage.
3- Turn the dough out onto a lightly floured surface and knead for about 5 minutes, until the dough becomes smooth and elastic. This process helps develop the gluten, giving the bread its signature chewy texture.
4- Shape the dough into a ball and place it in a lightly greased bowl, turning it to coat the surface. Cover the bowl with a damp towel and let the dough rise for 10 minutes, until it has puffed up slightly.
5- Punch down the dough to release any air bubbles, then divide it into 8 equal pieces. Roll each piece into a smooth ball and arrange them on a baking sheet lined with parchment paper.
6- Brush the tops of the dough balls with the 1 tablespoon of olive oil, then bake for 15 minutes in the preheated oven, until the crust is golden brown and the interior is cooked through.
Pro Tips for Success
- Don’t be tempted to skip the kneading step – this crucial process helps develop the gluten and create the perfect texture.
- Make sure the water is warm, not hot, to avoid killing the yeast and preventing a proper rise.
- Keep a close eye on the bread in the oven, as ovens can vary in temperature and baking times.
- For an extra crisp crust, try misting the dough with water before baking or placing a shallow pan of water in the oven to create steam.
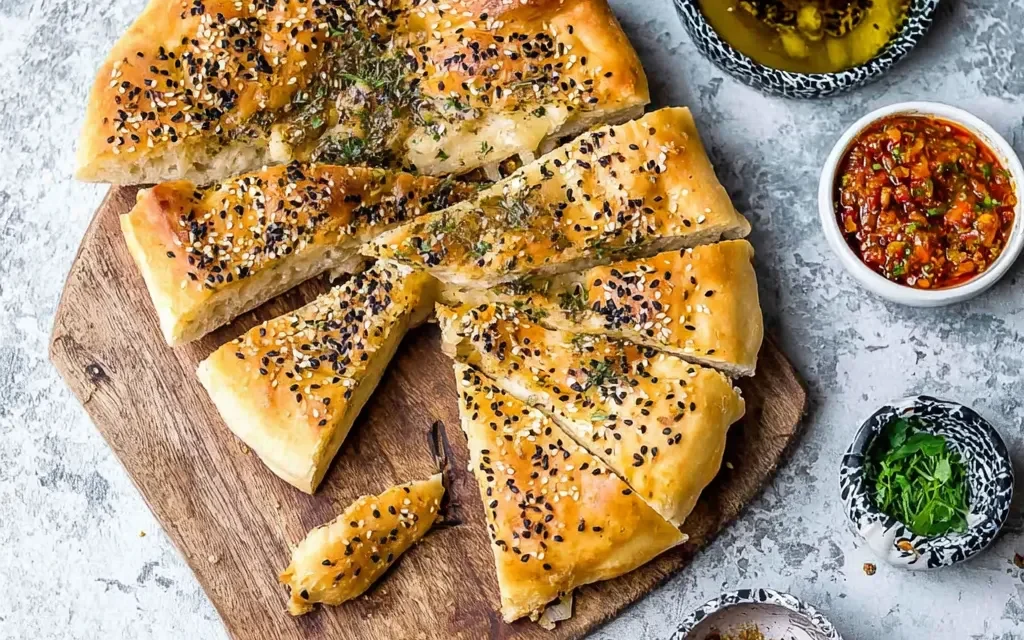
- Experiment with different toppings, like sesame seeds or za’atar, to add a personal touch to your Turkish bread.
Serving and Storing Your Turkish Bread
Perfect Pairings for Turkish Bread
With its versatile flavor and texture, this Turkish bread is the perfect accompaniment to a variety of dishes. Serve it alongside hearty stews, creamy dips, or as a base for sandwiches. It also makes a wonderful side to grilled meats, roasted vegetables, or a simple salad. And don’t forget the Turkish tea – the perfect pairing for this 8-serving recipe.
Storage and Make-Ahead Tips
One of the best things about this Turkish bread recipe is that it’s so easy to make in advance. After baking, let the bread cool completely, then store it in an airtight container at room temperature for up to 3 days. For longer storage, you can freeze the bread for up to 2 months. To reheat, simply place the frozen bread in a 350°F oven for 10-15 minutes, or until warmed through.
Variations and Dietary Adaptations for Turkish Bread
Creative Turkish Bread Variations
While this classic Turkish bread recipe is already a showstopper, there are plenty of ways to put your own spin on it. Try adding chopped herbs, like rosemary or thyme, for a fragrant twist. For a touch of sweetness, fold in a handful of raisins or chopped dried apricots. You could even experiment with different types of flour, such as whole wheat or spelt, to create a heartier loaf.
Making Turkish Bread Diet-Friendly
For those with dietary restrictions, fear not – this Turkish bread recipe can be easily adapted. To make it gluten-free, simply substitute the all-purpose flour with a high-quality gluten-free flour blend. For a vegan version, replace the olive oil with a plant-based oil, such as avocado or coconut oil. And for a low-carb take, try using a combination of almond flour and psyllium husk powder in place of the all-purpose flour.
Frequently Asked Questions
Q: Can I substitute the all-purpose flour with whole wheat flour?
A: Absolutely! You can substitute up to 50% of the all-purpose flour with whole wheat flour for a heartier, nuttier-tasting bread.
Q: How can I tell if the dough has risen enough before baking?
A: The dough should have puffed up slightly and doubled in size after the 10-minute rise. You can also gently poke the dough with your finger – if the indentation springs back slowly, it’s ready to bake.
Q: How long will the baked Turkish bread stay fresh?
A: The baked bread will keep for up to 3 days stored in an airtight container at room temperature. For longer storage, you can freeze the bread for up to 2 months.
Q: How many servings does this Turkish bread recipe yield?
A: This recipe makes 8 servings of Turkish bread, each a delightful, hand-sized portion.
Q: What should I do if the bread doesn’t rise properly?
A: If the dough isn’t rising as expected, make sure the yeast is fresh and the water is at the right temperature. You can also try proofing the dough in a slightly warmer environment, such as a turned-off oven with the light on.

Turkish Bread
- Total Time: 30
- Yield: 8 servings
- Diet: Vegetarian
Description
Discover the irresistible flavors of traditional Turkish Bread, a soft and fluffy flatbread that’s perfect for any occasion. This homemade version is easy to make and bursting with aromatic goodness.
Ingredients
– 3 cups all-purpose flour
– 1 teaspoon active dry yeast
– 1 teaspoon salt
– 1 1/4 cups warm water
– 1 tablespoon olive oil
Instructions
1. In a large bowl, combine the flour, yeast, and salt. Create a well in the center and pour in the warm water and olive oil.
2. Using a wooden spoon or your hands, mix the ingredients together until a shaggy dough forms.
3. Turn the dough out onto a lightly floured surface and knead for about 5-7 minutes, until the dough becomes smooth and elastic.
4. Place the dough in a lightly greased bowl, cover with a damp towel, and let rise for 1 hour or until doubled in size.
5. Punch down the dough to release any air bubbles. Divide the dough into 8 equal pieces and roll each piece into a round flatbread shape.
6. Heat a large skillet or griddle over medium heat. Cook the Turkish Bread for 2-3 minutes per side, until golden brown and puffed up.
7. Serve warm with your favorite dips, spreads, or alongside your main dish.
Notes
For a softer texture, brush the warm bread with melted butter or olive oil. You can also sprinkle the bread with sesame seeds or other herbs and spices before baking.
- Prep Time: 15
- Cook Time: 15
- Category: Tarts, Toasts & Flatbreads
- Method: Baking
- Cuisine: Turkish
Conclusion
This Turkish bread recipe is a true testament to the art of traditional baking. With its perfect balance of crisp crust and soft, pillowy interior, it’s a bread that will transport you to the bustling streets of Istanbul with every bite. Whether you’re serving it as a side to a hearty stew or simply enjoying it on its own, this recipe is sure to become a new household favorite. So gather your ingredients, preheat your oven, and get ready to experience the warmth and flavor of authentic Turkish bread. Happy baking!


