
The crisp autumn air filled my grandma’s kitchen as I stepped inside, the aroma of freshly baked Bloomin’ Apples wafting through the room. I can still remember the sights and sounds of that day – the soft glow of the oven light, the sizzle of the caramelized sugar, and my grandma’s gentle humming as she carefully arranged the golden apple slices. It was a moment of pure comfort and joy, and those Bloomin’ Apples became a cherished family tradition that I’ve carried on to this day.
Why This Bloomin’ Apples Recipe Will Become Your Go-To
There’s just something so special about Bloomin’ Apples – the way the tart apples melt into a sweet, gooey filling, encased in a crisp, buttery crust. It’s a flavor explosion that never fails to satisfy. But what really sets this recipe apart is the secret technique my grandma taught me, which ensures the apples cook to perfection every single time. Trust me, once you master this method, you’ll be making Bloomin’ Apples on repeat.
The Secret Behind Perfect Bloomin’ Apples
The key to achieving that irresistible texture is all in the way you slice and arrange the apples. By cutting them into thin, even slices and stacking them in a certain pattern, you create pockets of air that allow the juices to circulate and the sugar to caramelize to perfection. It’s a small but mighty trick that takes Bloomin’ Apples from good to absolutely sublime.
Essential Ingredients You’ll Need
- Granny Smith apples – These tart, crisp apples hold their shape beautifully during baking and provide the perfect balance of sweetness.
- Brown sugar – For a rich, caramelized flavor that complements the apples.
- Butter – Unsalted butter creates a flaky, buttery crust that melts in your mouth.
- Cinnamon – The warm, fragrant spice enhances the autumnal flavors of the Bloomin’ Apples.
- Nutmeg – A touch of nutmeg adds a subtle complexity that takes this dish to the next level.
Step-by-Step Bloomin’ Apples Instructions
Preparing Your Bloomin’ Apples
Get ready to enjoy the most delicious Bloomin’ Apples you’ve ever had! This recipe is surprisingly easy to make, and it only takes about an hour from start to finish. You’ll need a sharp knife, a rimmed baking sheet, and a bit of patience, but trust me, the end result is well worth it.
1- Start by preheating your oven to 375°F (190°C). Peel, core, and slice your Granny Smith apples into thin, even slices about 1/4-inch thick.
2- Arrange the apple slices in a circular pattern on the baking sheet, starting from the outside and working your way in. Overlap the slices slightly to create those all-important air pockets.
3- In a small bowl, mix together the brown sugar, cinnamon, and nutmeg. Sprinkle this spice mixture evenly over the arranged apple slices.
4- Cut the butter into small cubes and dot them all over the top of the apples. This will help the crust get nice and golden brown.
5- Bake the Bloomin’ Apples for 30-35 minutes, until the apples are tender and the edges are caramelized.
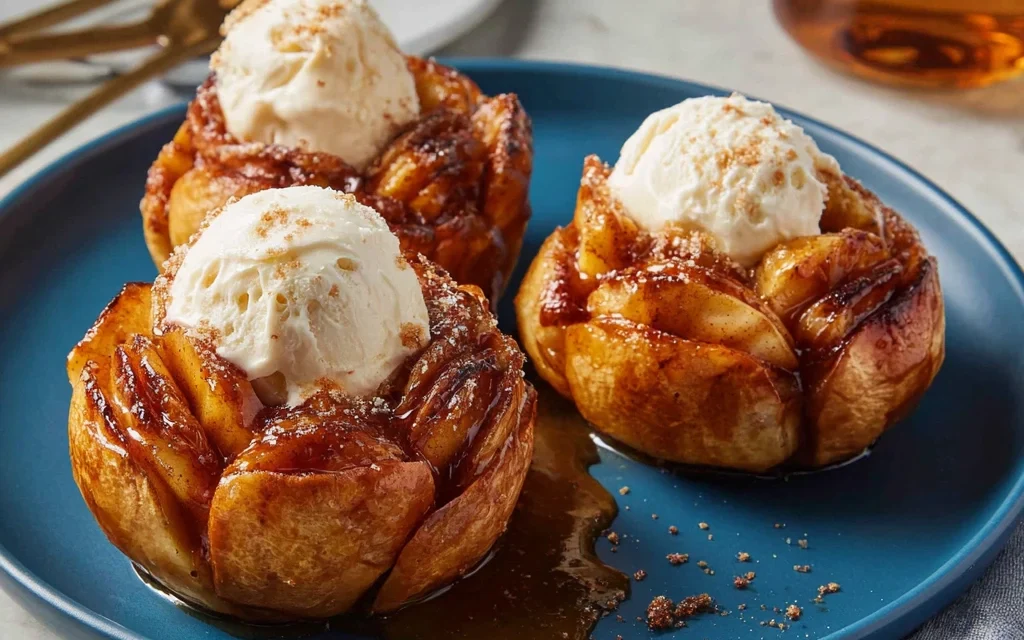
6- Let the Bloomin’ Apples cool for 5-10 minutes before serving. They’re absolutely delicious on their own, but a scoop of vanilla ice cream or a drizzle of caramel sauce takes them to the next level.
Pro Tips for Success
- Be sure to slice the apples evenly – this ensures they cook at the same rate.
- Don’t skip the spice mixture! The cinnamon and nutmeg really make the flavors pop.
- Keep a close eye on the Bloomin’ Apples during the last 10 minutes of baking to prevent the edges from burning.
- If you want an extra-crispy crust, you can brush the apple slices with a bit of melted butter before baking.
Serving and Storing Your Bloomin’ Apples
Perfect Pairings for Bloomin’ Apples
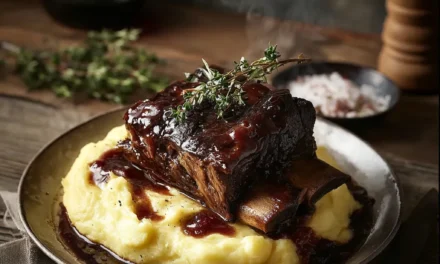
Bloomin’ Apples are the ultimate autumn dessert, but they also make a fantastic side dish or snack. Serve them alongside roasted pork tenderloin or a hearty beef stew for a cozy, comforting meal. They’re also delicious with a scoop of vanilla ice cream or a drizzle of caramel sauce for a decadent treat. And don’t forget the hot apple cider – it’s the perfect pairing for this autumnal delight.
Storage and Make-Ahead Tips
Leftover Bloomin’ Apples can be stored in an airtight container in the refrigerator for up to 4 days. To reheat, simply pop them back in the oven at 350°F (175°C) for 10-15 minutes until warmed through. You can also make the entire dish ahead of time and keep it in the fridge until you’re ready to bake it off. Just add an extra 5-10 minutes to the baking time to account for the chilled apples.
Variations and Dietary Adaptations for Bloomin’ Apples
Creative Bloomin’ Apples Variations
The beauty of Bloomin’ Apples is that they lend themselves to endless variations. Try swapping the Granny Smiths for a mix of tart and sweet apples, like Honeycrisp and Fuji. You can also experiment with different spice blends, like adding a touch of ginger or a sprinkle of cardamom. For a decadent twist, drizzle the Bloomin’ Apples with a salted caramel sauce before serving.
Making Bloomin’ Apples Diet-Friendly
If you’re looking to make this recipe a bit more health-conscious, there are a few simple substitutions you can try. Use a sugar substitute like erythritol or monk fruit in place of the brown sugar for a low-carb version. Swap the butter for coconut oil or vegan butter to make it dairy-free. And for a gluten-free option, simply use a gluten-free pie crust or biscuit dough in place of the traditional pastry.
Frequently Asked Questions
Q: Can I use a different type of apple besides Granny Smith?
A: Absolutely! While Granny Smiths are the classic choice, you can experiment with a variety of apples. Honeycrisp, Fuji, and Gala apples all work well and will provide different flavor profiles.
Q: How do I know when the Bloomin’ Apples are done baking?
A: The Bloomin’ Apples are ready when the apples are tender and the edges are nicely caramelized. Keep an eye on them during the last 10 minutes of baking to ensure the crust doesn’t burn.
Q: Can I make Bloomin’ Apples ahead of time?
A: Yes, you can! Prepare the dish up to the baking step, then cover and refrigerate until you’re ready to bake. Just add a few extra minutes to the baking time to account for the chilled apples.
Q: How do I reheat leftover Bloomin’ Apples?
A: To reheat, simply place the Bloomin’ Apples in a 350°F (175°C) oven for 10-15 minutes until warmed through. You can also enjoy them chilled or at room temperature.
Q: Can I freeze Bloomin’ Apples?
A: While you can freeze the baked Bloomin’ Apples, the texture may not be quite as crisp and flaky after thawing. For best results, I recommend enjoying them fresh or refrigerating any leftovers.

Bloomin’ Apples: A Timeless Classic Dessert
- Total Time: 40
- Yield: 6
Description
Indulge in the irresistible sweetness of Bloomin’ Apples, a classic fall dessert that’s bursting with cinnamon-infused flavor. These baked apples are hollowed out and filled with a decadent brown sugar and spice mixture, creating a heavenly treat that’s sure to satisfy your cravings.
Ingredients
– 6 large Gala or Honeycrisp apples
– 1/2 cup brown sugar
– 2 tablespoons unsalted butter, softened
– 1 teaspoon ground cinnamon
– 1/4 teaspoon ground nutmeg
– 1/4 teaspoon ground cloves
– 1/4 cup chopped pecans (optional)
– Vanilla ice cream, for serving (optional)
Instructions
1. 1. Preheat your oven to 375°F (190°C).
2. 2. Using a sharp knife or an apple corer, carefully hollow out the centers of the apples, leaving about 1/2 inch of the apple flesh intact at the bottom.
3. 3. In a small bowl, mix together the brown sugar, softened butter, cinnamon, nutmeg, and cloves until well combined.
4. 4. Spoon the brown sugar mixture into the hollowed-out apples, pressing it down gently to compact it.
5. 5. Place the filled apples in a baking dish and bake for 30-35 minutes, or until the apples are tender and the filling is bubbling.
6. 6. Remove the Bloomin’ Apples from the oven and let them cool for a few minutes.
7. 7. Serve the Bloomin’ Apples warm, optionally with a scoop of vanilla ice cream and a sprinkle of chopped pecans.
Notes
For a more indulgent treat, drizzle the baked Bloomin’ Apples with a caramel sauce or a dusting of powdered sugar. You can also try different apple varieties, such as Honeycrisp or Gala, for a slightly different flavor profile.
- Prep Time: 10
- Cook Time: 30
- Category: Dessert
- Method: Baking
- Cuisine: American
Conclusion
Bloomin’ Apples are the epitome of autumn comfort food, and this recipe is sure to become a new family favorite. With its perfect balance of tart and sweet, and that irresistible caramelized crust, it’s a dessert that’s sure to impress. So grab those Granny Smiths, preheat your oven, and get ready to create a delicious autumnal masterpiece. Don’t forget to share your creations with me – I’d love to see how your Bloomin’ Apples turn out!


