
Thanksgiving has always been my favorite holiday. There’s just something so special about gathering with loved ones, sharing a delicious meal, and reflecting on all the things we’re grateful for. And at the heart of every Thanksgiving feast is the iconic Thanksgiving Gravy. I can still remember the first time my grandma taught me her secret recipe – the rich, savory flavors, the perfectly creamy texture, and the way it tied the whole meal together. It’s a dish that’s become a cherished tradition in our family, and I’m thrilled to share it with you today.
Why This Thanksgiving Gravy Recipe Will Become Your Go-To
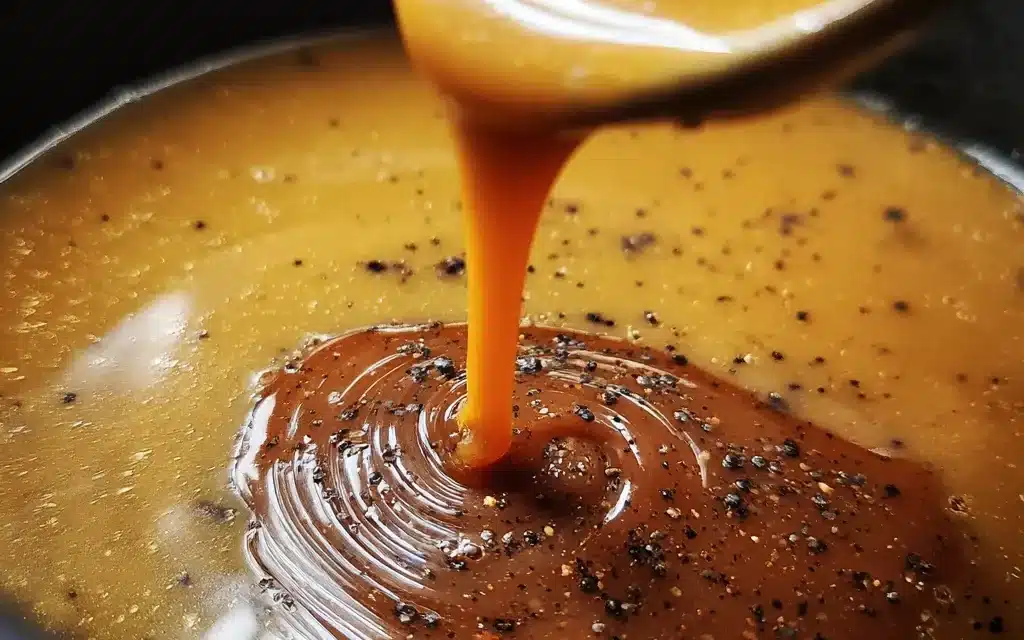
The Secret Behind Perfect Thanksgiving Gravy
This Thanksgiving Gravy recipe is truly the best you’ll ever taste. It’s made with a few simple, high-quality ingredients, but the real magic comes from the technique. By slowly simmering the pan drippings and carefully whisking in the flour, you end up with a gravy that’s incredibly rich, silky, and full of that signature Thanksgiving flavor. The key is to take your time and let the flavors develop – trust me, it’s worth the extra effort!
Essential Ingredients You’ll Need
To make the perfect Thanksgiving Gravy, you’ll need:
- Roasted turkey pan drippings – This is the foundation of your gravy, so don’t skimp on this! The more flavorful the drippings, the better your gravy will be.
- All-purpose flour – This will help thicken the gravy and create that luscious, velvety texture.
- Chicken or turkey stock – You’ll need a good quality, low-sodium stock to thin out the gravy and add even more savory depth.
- Butter – A touch of butter at the end gives the gravy a beautiful shine and adds a lovely richness.
- Salt and pepper – Simple seasonings to enhance all the flavors.
Step-by-Step Thanksgiving Gravy Instructions
Preparing Your Thanksgiving Gravy
Making Thanksgiving Gravy is easy, but it does require a bit of time and attention. Set aside about 30 minutes to go through the process, and make sure you have all your ingredients and equipment ready to go. You’ll need a large skillet or saucepan, a whisk, and a heatproof spatula or spoon.
1- Start by removing your roasted turkey from the pan and setting it aside to rest. Carefully pour the turkey pan drippings into a measuring cup, scraping up any browned bits from the bottom of the pan.
2- In your skillet or saucepan, whisk the all-purpose flour into the hot turkey drippings over medium heat. Cook for 2-3 minutes, whisking constantly, until the flour is fully incorporated and the mixture starts to thicken.
3- Slowly pour in the chicken or turkey stock, whisking continuously to prevent lumps from forming. Bring the gravy to a gentle simmer and let it cook for 10-15 minutes, stirring occasionally, until it reaches your desired thickness.
4- Taste the gravy and season with salt and pepper as needed. You’re looking for a rich, savory flavor that perfectly complements your Thanksgiving turkey.
5- Just before serving, stir in a couple tablespoons of butter to give the gravy a beautiful glossy sheen.
6- Transfer the Thanksgiving Gravy to a serving bowl and enjoy! It’s the perfect topping for slices of juicy roasted turkey, mashed potatoes, stuffing, and all your other favorite Thanksgiving dishes.
Pro Tips for Success
Here are a few expert tips to ensure your Thanksgiving Gravy is absolutely perfect:
– Make sure to scrape up all the browned bits from the turkey pan – that’s where a lot of the flavor comes from.
– Whisk the flour and drippings together thoroughly before adding the stock to prevent lumps.
– Simmer the gravy gently and stir frequently for the best texture.
– Taste and adjust the seasoning as needed – everyone has different preferences when it comes to saltiness and pepper levels.
– If your gravy is too thick, simply whisk in a bit more stock. If it’s too thin, let it simmer a little longer to thicken up.
Serving and Storing Your Thanksgiving Gravy
Perfect Pairings for Thanksgiving Gravy
Thanksgiving Gravy is the ultimate accompaniment to your holiday feast. It’s absolutely delicious drizzled over slices of juicy roasted turkey, creamy mashed potatoes, savory stuffing, and tender roasted vegetables. You can even use it as a dipping sauce for warm, flaky dinner rolls. And don’t forget to serve it alongside classic Thanksgiving sides like cranberry sauce, green bean casserole, and sweet potato casserole.
Storage and Make-Ahead Tips
If you have any Thanksgiving Gravy leftover, it can be stored in an airtight container in the refrigerator for up to 4 days. To reheat, simply transfer it to a saucepan and warm it over medium heat, stirring occasionally, until hot and smooth.
You can also make this Thanksgiving Gravy recipe ahead of time. Simply prepare the gravy as directed, let it cool completely, then transfer it to a freezer-safe container. It will keep in the freezer for up to 3 months. When you’re ready to serve, thaw it in the refrigerator overnight and then reheat on the stovetop.
Variations and Dietary Adaptations for Thanksgiving Gravy
Creative Thanksgiving Gravy Variations
While this classic Thanksgiving Gravy recipe is absolutely delicious as-is, there are lots of fun ways to put your own spin on it. For a richer, more decadent gravy, try adding a splash of heavy cream or a dollop of sour cream. You could also stir in some fresh herbs like thyme, rosemary, or sage. For a bit of a kick, add a pinch of cayenne or a dash of hot sauce.
Making Thanksgiving Gravy Diet-Friendly
Need a gluten-free or vegan version of this Thanksgiving Gravy? No problem! To make it gluten-free, simply substitute the all-purpose flour with an equal amount of your favorite gluten-free flour blend. For a vegan Thanksgiving Gravy, use olive oil instead of butter and replace the chicken/turkey stock with a high-quality vegetable broth. You can even make it dairy-free by omitting the butter at the end.
Frequently Asked Questions
Q: Can I use the drippings from a store-bought roasted turkey?
A: Absolutely! The pan drippings from a store-bought turkey will work just as well in this recipe. Just be sure to scrape up all those delicious browned bits.
Q: How long does it take to make Thanksgiving Gravy?
A: This Thanksgiving Gravy recipe takes about 30 minutes from start to finish. The majority of that time is spent simmering the gravy to allow the flavors to develop.
Q: Can I make Thanksgiving Gravy ahead of time?
A: Yes, this gravy reheats beautifully! You can make it up to 4 days in advance and store it in the fridge. You can also freeze it for up to 3 months.
Q: What’s the best way to thicken up thin Thanksgiving Gravy?
A: If your gravy is too thin, simply let it simmer a little longer, stirring frequently, until it reaches your desired consistency. You can also try whisking in a slurry made with a bit of flour and cold water.
Q: Help! My Thanksgiving Gravy is lumpy. What did I do wrong?
A: Lumps in gravy are usually caused by not whisking the flour into the drippings thoroughly enough. Next time, be sure to whisk continuously as you add the flour, and then again when you pour in the stock. Straining the gravy through a fine-mesh sieve can also help remove any lingering lumps.

Thanksgiving Gravy
- Total Time: 15
- Yield: 6 servings
Description
This quick and easy Thanksgiving Gravy recipe is a must-have for your holiday feast. Smooth, flavorful, and ready in just 10 minutes, it’s the perfect complement to your roasted turkey, mashed potatoes, and other holiday favorites.
Ingredients
– 4 tablespoons unsalted butter
– 1/4 cup all-purpose flour
– 2 cups turkey or chicken broth
– 1 teaspoon fresh thyme, chopped
– 1/2 teaspoon salt
– 1/4 teaspoon black pepper
Instructions
1. 1. In a medium saucepan, melt the butter over medium heat.
2. 2. Whisk in the flour and cook for 1-2 minutes, stirring constantly, until the mixture is smooth and bubbling.
3. 3. Gradually whisk in the broth, a little at a time, until the mixture is smooth and free of lumps.
4. 4. Bring the gravy to a simmer and cook, stirring occasionally, until thickened to your desired consistency, about 5-7 minutes.
5. 5. Stir in the fresh thyme, salt, and pepper.
6. 6. Serve the gravy warm over roasted turkey, mashed potatoes, or other holiday favorites.
Notes
For a richer gravy, use turkey drippings or bone broth in place of chicken broth. You can also adjust the consistency by adding more or less broth to reach your preferred thickness. Leftovers can be stored in the refrigerator for up to 4 days.
- Prep Time: 5
- Cook Time: 10
- Category: Side Dish
- Method: Stovetop
- Cuisine: American
Conclusion
I hope this Thanksgiving Gravy recipe becomes a new cherished tradition in your household, just like it is for mine. It’s the perfect complement to your holiday feast, elevating every bite with its rich, savory flavor. So don’t be intimidated – give this easy, foolproof method a try, and get ready to wow your friends and family. And as always, I’d love to hear your thoughts! Drop me a comment and let me know how your Thanksgiving Gravy turns out.


