
I still remember the first time I baked Strawberry Jam Thumbprints. It was a rainy Saturday afternoon, and my grandmother had invited me over for a baking session. The kitchen was filled with the warm, buttery aroma of cookies, and the sound of rain pattering against the window created a cozy atmosphere. As we mixed the dough, she shared stories of her own childhood, baking these very cookies with her mother. It felt like a rite of passage, connecting generations through a simple yet delicious recipe.
When we finally pulled the Strawberry Jam Thumbprints out of the oven, I was mesmerized by their golden edges and the glistening, ruby-red jam nestled in the center. The moment I took my first bite, the buttery cookie melted in my mouth, and the sweet-tart strawberry jam danced on my taste buds. It was pure bliss! Since then, these cookies have become a staple in my baking repertoire, and every time I make them, I’m transported back to that rainy afternoon filled with laughter, love, and delicious treats.
If you’re looking for a cookie that’s not only easy to make but also brings a sense of nostalgia and warmth, then Strawberry Jam Thumbprints are the perfect choice. Whether you’re baking for a family gathering or just treating yourself, these cookies are sure to delight.
Why This Strawberry Jam Thumbprints Recipe Will Become Your Go-To
The Secret Behind Perfect Strawberry Jam Thumbprints
This Strawberry Jam Thumbprints recipe stands out for its simplicity and flavor balance. The buttery dough provides a rich base, while the strawberry jam adds a burst of fruity sweetness, creating a delightful contrast. One of the unique techniques in this recipe is the way the thumbprint is created; gently pressing your thumb into the dough not only creates a perfect indentation but also ensures that the jam stays put during baking. This method ensures that each cookie is perfectly formed and holds just the right amount of jam, making every bite a little taste of heaven. The texture is also exceptional—crispy on the edges, yet soft and chewy in the center.
Another reason you’ll love this recipe is its versatility. You can easily swap out the strawberry jam for other flavors like raspberry or apricot, making it suitable for any occasion or preference. Plus, it’s a fantastic way to use up any extra jam you might have lurking in your pantry. With just five simple ingredients, this Strawberry Jam Thumbprints recipe is not only quick and easy but also incredibly rewarding.
Essential Ingredients You’ll Need
To make the most delicious Strawberry Jam Thumbprints, you’ll need the following ingredients:
1 cup unsalted butter, softened
Softened butter is key to achieving a smooth, creamy dough. It helps create a tender cookie that melts in your mouth, allowing the flavors to shine.
1/2 cup granulated sugar
The sugar adds sweetness and helps create the cookies’ golden edges. It also contributes to the lovely texture, giving the cookies a slight crunch outside while remaining soft inside.
1 teaspoon vanilla extract
Vanilla extract brings depth and enhances the overall flavor of the cookies. It pairs beautifully with the strawberry jam, creating a harmonious taste experience.
2 cups all-purpose flour
Flour is the backbone of the cookie dough, providing structure. The right amount ensures the cookies hold their shape and have a perfect crumb.
1/4 teaspoon salt
Salt enhances the flavors of the other ingredients, balancing the sweetness and elevating the overall taste of the Strawberry Jam Thumbprints.
1/2 cup strawberry jam
The star of the show! Strawberry jam adds a fruity sweetness that contrasts beautifully with the buttery cookie base. It’s essential for creating that signature thumbprint look and taste.
Step-by-Step Strawberry Jam Thumbprints Instructions
Preparing Your Strawberry Jam Thumbprints
Making these Strawberry Jam Thumbprints is a breeze! With a prep time of only 15 minutes and a cook time of 18 minutes, you’ll have a delicious batch ready in just 33 minutes. You’ll need basic baking equipment like mixing bowls, a baking sheet, and parchment paper. Let’s get started!
1- Begin by preheating your oven to 350°F (175°C). Line a baking sheet with parchment paper to prevent the cookies from sticking. This step is crucial for easy cleanup later and ensures even baking.
2- In a large mixing bowl, cream together 1 cup of softened unsalted butter and 1/2 cup of granulated sugar. Use a hand mixer or stand mixer on medium speed until the mixture is light and fluffy, about 2-3 minutes. You want to see the sugar crystals dissolve into the butter, creating a smooth base that’s pale in color.
3- Add 1 teaspoon of vanilla extract to the butter-sugar mixture, mixing until fully incorporated. Then, sift in 2 cups of all-purpose flour and 1/4 teaspoon of salt. Mix on low speed just until the flour is combined and a soft dough forms. Be careful not to overmix, as this can lead to tough cookies.
4- Using your hands or a cookie scoop, form the dough into 1-inch balls and place them about 2 inches apart on the prepared baking sheet. After placing the dough balls, use your thumb or the back of a measuring spoon to create an indentation in the center of each ball. This is where the strawberry jam will go, so make sure it’s deep enough to hold the jam but not so deep that it goes through to the bottom.
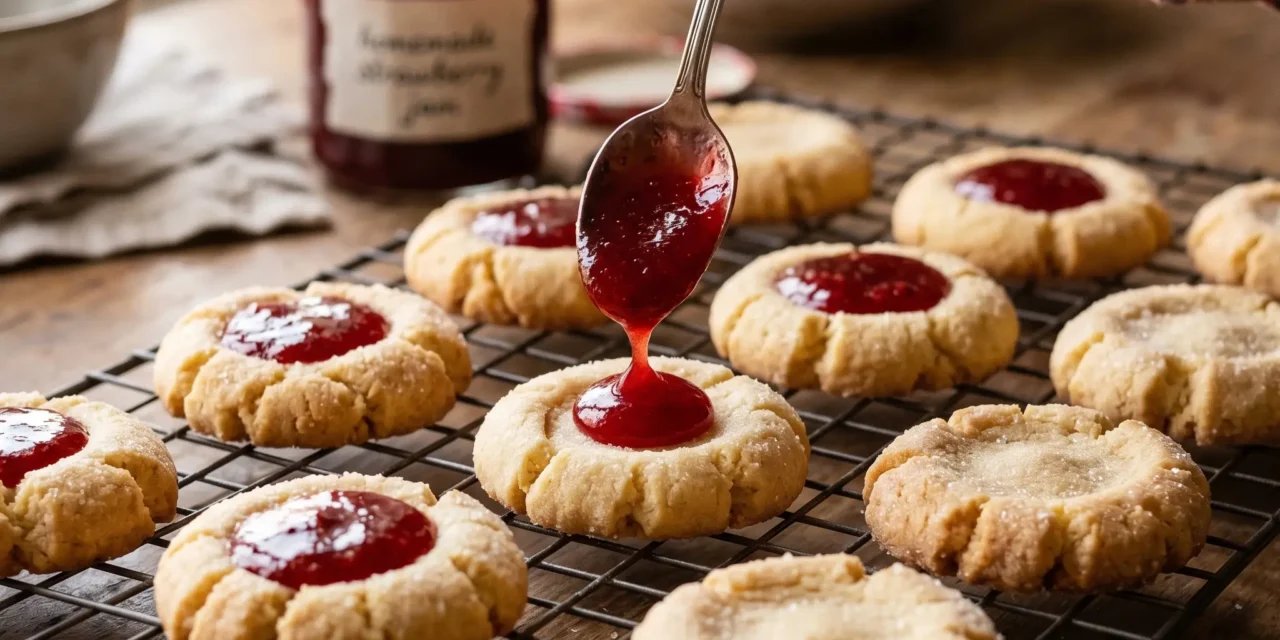
5- Fill each thumbprint with about 1 teaspoon of strawberry jam. It’s okay if some jam spills over; it will create a beautiful, glossy finish as it bakes. The jam will bubble slightly, creating a lovely texture on top of the cookies.
6- Bake the cookies in the preheated oven for 15-18 minutes, or until the edges are lightly golden. Keep an eye on them around the 15-minute mark; you want them to be just set but still soft. When done, remove them from the oven and allow them to cool on the baking sheet for a few minutes before transferring them to a wire rack to cool completely. The aroma wafting through your kitchen will be utterly irresistible!
Pro Tips for Success
To ensure your Strawberry Jam Thumbprints turn out perfectly, keep these pro tips in mind:
- Make sure your butter is truly softened, not melted. It should be at room temperature, which allows for better creaming with the sugar.
- Use a cookie scoop for uniform dough balls. This will ensure even baking and presentation.
- If your dough is too sticky, chill it in the refrigerator for about 15 minutes before shaping. This makes it easier to handle and helps the cookies hold their shape.
- Don’t skip the parchment paper! It not only prevents sticking but also helps with even baking.
- Experiment with different jams! While strawberry is classic, raspberry or apricot can add a fun twist to your thumbprints.
Serving and Storing Your Strawberry Jam Thumbprints
Perfect Pairings for Strawberry Jam Thumbprints
These Strawberry Jam Thumbprints are delightful on their own but can also be paired with various treats and beverages. Serve them with a steaming cup of tea or coffee for a cozy afternoon snack. They make an excellent addition to a dessert platter at parties or holiday gatherings, especially since this recipe yields 24 cookies.
For a complete dessert experience, consider serving them alongside a scoop of vanilla ice cream or drizzling them with a warm chocolate sauce. They’re also perfect for a picnic or a bake sale, bringing a touch of nostalgia and homemade goodness.
Storage and Make-Ahead Tips
If you want to prepare these Strawberry Jam Thumbprints in advance, you can store them in an airtight container at room temperature for up to a week. To keep them fresh, layer the cookies with parchment paper to prevent sticking.
For longer storage, you can freeze the unbaked dough. Simply form the dough balls and freeze them in a single layer on a baking sheet. Once frozen, transfer them to a freezer-safe bag or container. They can be stored for up to three months. When you’re ready to bake, just add a couple of extra minutes to the baking time while the cookies are still frozen.
If you have leftover baked cookies, store them in the refrigerator for up to two weeks. Reheat them in the microwave for about 10-15 seconds to bring back their soft texture before serving.
Variations and Dietary Adaptations for Strawberry Jam Thumbprints
Creative Strawberry Jam Thumbprints Variations
Why stick to just strawberry jam? Here are a few creative variations to try:
- Raspberry Jam Thumbprints: Substitute the strawberry jam with raspberry jam for a slightly tart flavor that pairs beautifully with the buttery cookie.
- Chocolate Hazelnut Thumbprints: Use a nut spread like Nutella instead of jam for a decadent twist. You can even sprinkle chopped hazelnuts on top for added crunch.
- Citrus Thumbprints: Incorporate citrus flavors by using lemon or orange curd as the filling. The tangy curd will brighten up the cookie and give it a refreshing taste.
- Nut Butters: Swap the jam for your favorite nut butter like almond or peanut butter. Add a sprinkle of sea salt on top for a sweet and savory combination.
Making Strawberry Jam Thumbprints Diet-Friendly
You can easily adapt this recipe to meet various dietary needs. Here are some substitutions:
- Gluten-Free: Use a gluten-free all-purpose flour blend in place of regular flour. Make sure it contains xanthan gum to help with texture.
- Vegan: Substitute the unsalted butter with a vegan butter alternative and replace the egg with a flax egg (1 tablespoon ground flaxseed mixed with 2.5 tablespoons water).
- Low-Carb: Use almond flour in place of all-purpose flour and a sugar substitute like erythritol for a lower-carb option. Keep in mind that the texture may differ slightly.
- Sugar-Free: Use sugar-free jam and a sugar substitute in the dough to create a diabetic-friendly version without sacrificing flavor.
Frequently Asked Questions
Q: Can I substitute the jam for something else?
A: Absolutely! You can use any flavor of jam or curd you prefer, such as raspberry, apricot, or lemon curd. Just ensure it’s thick enough to hold its shape in the thumbprint.
Q: How can I ensure the cookies are baked perfectly in 33 minutes?
A: Stick to the prep time of 15 minutes and bake for 15-18 minutes. Keep a close eye on them around the 15-minute mark. The edges should be lightly golden when they’re done.
Q: How should I store leftover cookies?
A: Store any leftover Strawberry Jam Thumbprints in an airtight container at room temperature for up to a week. For longer storage, you can freeze them in an airtight container.
Q: How many servings does this recipe yield?
A: This recipe makes 24 cookies, perfect for sharing with family and friends or enjoying throughout the week.
Q: What if my cookies spread too much while baking?
A: If your cookies spread excessively, it could be due to overly soft butter or not enough flour. Make sure to measure accurately and chill the dough if it’s too warm.

Strawberry Jam Thumbprints
- Total Time: 33
- Yield: 24 cookies
- Diet: Vegetarian
Description
These Strawberry Jam Thumbprints are delightful buttery cookies with a sweet strawberry jam center, making them the perfect treat for any occasion. Easy and fun to make, they will impress your family and friends!
Ingredients
– 1 cup unsalted butter, softened
– 1/2 cup granulated sugar
– 1 teaspoon vanilla extract
– 2 cups all-purpose flour
– 1/4 teaspoon salt
– 1/2 cup strawberry jam
Instructions
1. Preheat your oven to 350°F (175°C).
2. In a mixing bowl, cream together the softened butter and granulated sugar until light and fluffy.
3. Add the vanilla extract and mix until combined.
4. Gradually add the flour and salt, mixing until a dough forms.
5. Shape the dough into 1-inch balls and place them on a baking sheet lined with parchment paper.
6. Use your thumb to make an indentation in the center of each ball.
7. Fill each indentation with strawberry jam.
8. Bake for 15-18 minutes or until the edges are lightly golden.
9. Let cool on a wire rack before serving.
Notes
For a variation, try using different flavors of jam such as raspberry or apricot. Store in an airtight container for up to one week.
- Prep Time: 15
- Cook Time: 18
- Category: Cookies & Bars
- Method: Baking
- Cuisine: American
Conclusion
I hope this Strawberry Jam Thumbprints recipe inspires you to create delicious memories in your kitchen! With its simple ingredients and delightful flavor, it’s a treat that everyone will love. Don’t hesitate to share your baking adventures in the comments, and if you try the recipe, let me know how it turns out! Happy baking!


